The Process
All saddles are built with #1 Herman Oak saddle skirting. I favor Ben Swanke trees, but build on other trees as well.
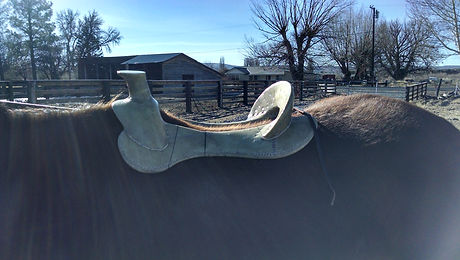
The foundation of the saddle must fit the type of horses a person will be riding. Gullet width and height, bar type, angle and rock are all taken into consideration. *A bare tree on a horse's back is not a great representation of how a finished saddle will fit, as there will be sheepskin and pads. It can help visualize and give an idea if the angles and clearances will work.

A bare Ben Swanke tree already checked on a flat surface to be square and true.
Tree layed out with center references, stirrup leather slots, and low spot using squares, dividers, and lasers to double check precision. Rawhide roughed up to promote thorough glue adhesion.

First layer of the ground seat using a Bean strainer nailed with ring shank nails.

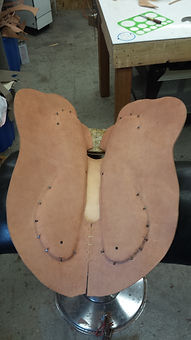
Final layer of the groundseat, shaped to closely match the original shape of the tree and eliminate bulkiness and weight.

Handhole cut after groundseat is approved.

The stirrup leathers are stretched and twisted. This eliminates excessive stretching with use and also sets the angle and position which the stirrups will hang to promote comfort and reduce knee strain. This stretcher twists the stirrups outward 30 degrees past 90 and downward about 15 degrees so that your feet set flat rather than perpendicular to the horse.

Hanging the rigging using square measurements from the tree bars, as well as the center of the cantle and a predetermined point on the swell established during layout. Front to back, as well as height, must match within 1 mm to be approved.

Installing the inskirt rigging plate after stamping. The front is blocked to fit the tree and it is drawn down to fit the contour of a horse.

Skirts are blocked to the tree to allow the bars to do their job fitting the horses back.

Skirts rough installed and shaped to match the contour of the horse.

Gullet cover installed with the top side as low profile as possible to reduce rope rubbing.

Cantle back installed.

Swell cover installed.

All of the attachments completed including hangers, rosettes, back cinch and billet straps.

Skirts plugged to create a smooth transition from skirt to bar while still allowing the bars to fit the back. They also give structure to the skirts so they won't curl.

Skirts are lined with 1" dense pile bark tanned sheepskin, with the nap oriented to prevent walking pads.

Inskirt fully installed, screwed top and bottom, tugs nailed to keep the back of the skirts from sagging.

Back jockeys fit snuggly against the cantle and the skirts.

Laying the seat in. One side is cut on the saddle, and the shape is transferred to the opposite side.

Swell tooled on the saddle.

Horn covered and ready to be sewn. A layer of leather hammered to maximize density is sandwiched between the cap and horn cover and nailed to prevent twisting and ensure the edge will hold up to wear.

Horn cap sewn and finished

Cantle binding sewn with a hidden stitch in the back

Saddle strung. Rosettes and hangers are screwed into the tree as opposed to the more traditional way of running strings through holes drilled in the tree. Not only is the structural integrity of the tree preserved, but strings are much easier to replace.

The completed saddle. Every piece is oiled during assembly. Once assembled everything is buttered, buffed, and on a smooth out, given a protective coating. The rope strap is run through the horn wrap in a way that should prevent your rope from wearing through the swell cover after lots of miles of trotting.


